När det kommer till reparationer av dessa sparkcyklar är det svårt att veta exakt fel innan en felsökning gjorts. I vissa fall går det att veta i förväg när man har en felkod som visas på displayen. I alla reparationer ingår upplåsning av programvara. Längst ner finns det en guide hur du bygger din egen firmware och vad alla parametrar innebär. Allt bygge sker på egen risk!
Stort tack till https://scooterhacking.org/ som gjort denna guide som finns längst ner!
Boka reparation via vårt bokningssystem här
Boka nu
Här kommer prislista på de vanligaste reparationerna.
| Upplåsning hastighet | 149/299:- |
| Upplåsning st link | 549:- |
| (om man kommer med bara moderkortet | 299:- |
| Byte gasknapp (Error 14) | 399:- |
| Byte bromsknapp (Error 15) | 399:- |
| Byte dashboard | 349:- |
| 1x däck byte | 499:- |
| 2x däck byte | 899:- |
| 1x däck byte och hjullager bak | 849:- |
| 1x däck byte och hjullager fram | 799:- |
| 2x däckbyte samt hjullager fram och bak | 1349:- |
| Byte hjullager fram | 499:- |
| Byte hjullager bak | 599:- |
| Byte hjullager fram och bak | 899:- |
| Felsökning | 499:- |
| Felsökning med mindre fel som åtgärdas | 549:- |
| Felsökning med moderkortsbyte (Error 18) | 699:- |
| 1h reperation | 499 |
| 2h reperation | 849 |
| 3h reperation | 1199 |
Priser på delar:
Original moderkort 899:-399:-
Inkl. delar
< 600 km
- Åtdragning med locktight
- Koll av lufttryck
- Spänna broms
749:-
Inkl. delar
600-2000 km
- Åtdragning med locktight
- Koll av lufttryck
- Spänna broms
- Byte hjullager fram
1799:-
Inkl. delar
> 2000 km
- Åtdragning med locktight
- Koll av lufttryck
- Se över bromsarna
- Byte hjullager fram o bak
- Byte bakdäck
| Error Codes | Descriptions | Replacement Parts |
| 10 | Communication between Dashboard and Control Board is Abnormal, Please check the related connections | Dashboard , Control Board |
| 11 | Wheel Hub Motor A Phase Current sampling is Abnormal, please check the main Control Board | Control Board |
| 12 | Wheel Hub Motor B Phase Current sampling is Abnormal, please check the main Control Board | Control Board |
| 13 | Wheel Hub Motor C Phase Current sampling is Abnormal, please check the main Control Board | Control Board |
| 14 | Throttle Hall is abnormal, please check the Throttle Switch, Dashboard & related Connections | Dashboard , Electric Throttle |
| 15 | Brake Hall is abnormal, please check the Throttle Switch, Dashboard & related Connections | Dashboard , Brake lever |
| 18 | Wheel Hub Motor Hall is abnormal , Please check the Motor, Control Board & related connections | Control Board , wheel Hub Motor |
| 19 | Battery Voltage detection is abnormal, Please check the Battery, Control Board and related connections | Control Board , wheel Hub Motor |
| 21 | Battery Communication Error, Please check the Battery, Control Board & related connections | Battery |
| 22 | Battery Password Error, Please replace the Battery | Battery |
| 23 | Battery Default Serial Number, Please Replace the Battery | Battery |
| 24 | System Voltage detection is abnormal, Please check the Control Board | Control Board , Battery |
| 26 | Flash Storage Error, Please check the Control Board | Control Board |
| 27 | Control Board Password Error, Please replace the Control Board | Control Board |
| 28 | Motor MOS driver upper Bridge is short circuited, Please check the Control Board | Control Board |
| 29 | Motor MOS driver Lower Bridge Error, Please check the Control Board | Control Board |
| 31 | Program Skip Error, Please check the Control Board | Control Board |
| 35 | Vehicle Default Serial Number, Please replace the Control Board | Control Board |
| 39 | Internal Battery Temperature Sensor is abnormal. Please replace the Battery. | Battery |
| 40 | Control Board Temperature Sensor is abnormal. Please check the Control Board. | Control Board , Battery |
Hint: This guide generally applies for all retail max models. Specifically speaking:
G30/D/E/P beginning from DRV126 as their base firmware.
G30/(L)/D/E/P II beginning from DRV154 as their base firmware.
Special Editions like the“Seat/Audi” G30D and also the “Maserati” Max can be flashed by this guide when a golden/magic s/n is being used to avoid compatibility problems.
Greetings,
at this page we will look at the site “max.cfw.sh” a CustomFirmware-Generator, that has been created by SH for the max.
If you like their work, then please donate them a coffee, they'll be happy about it!
Remember, everything your set or do here happens at your risk. This guide is here to help you understand the risk and implications of each patch.
And yes, I'm aware this guide may seem much, but it's worth to be read, as you can learn some things here! That's why it has been split up into some parts. Stay tuned.
First things first, you need to set in your mind for what your max will be used in your everyday life:
What kind of routes do I drive? (Steep or flat)
How's my driving style?
After you've set the answers for those questions in your mind, we may proceed to explain how this site and configurations work.
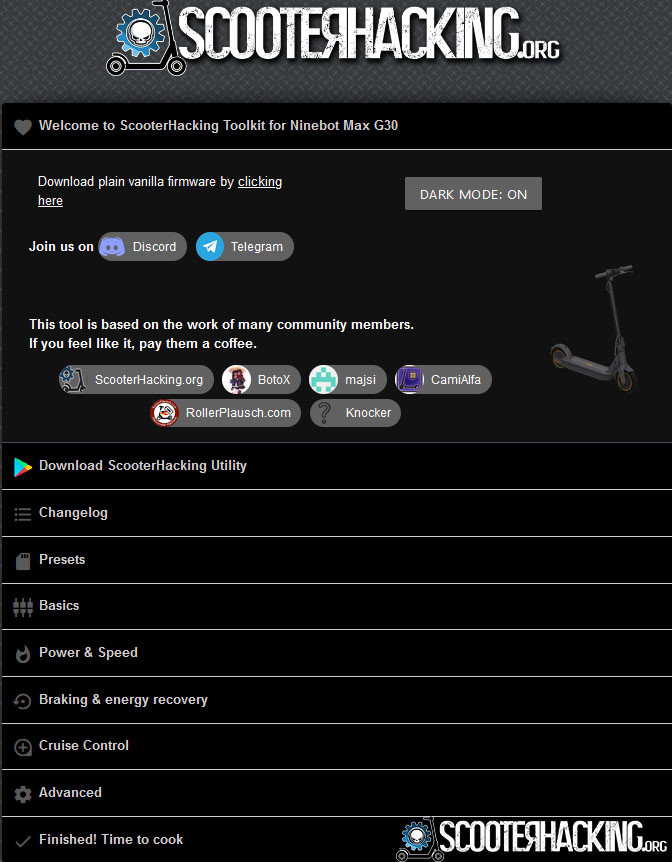
1. Vanilla

Here you'll find a “Vanilla” option at first sight of the page.
This is the firmware that shipped with your scooter. It doesn't contain any additions.
Vanilla means in normal/stock, a version without any additional features. You always can flash this file if you feel like going back to stock via SHU, SC or IAP as a .zip/.bin.enc file.
2. Changelog
![]()
Already mostly known, here is where the changes of the site's alteration in means as a Patch/Firmware/Versions. Here you can take a look at the changes visually and sorted, with just one click away.
3. Presets
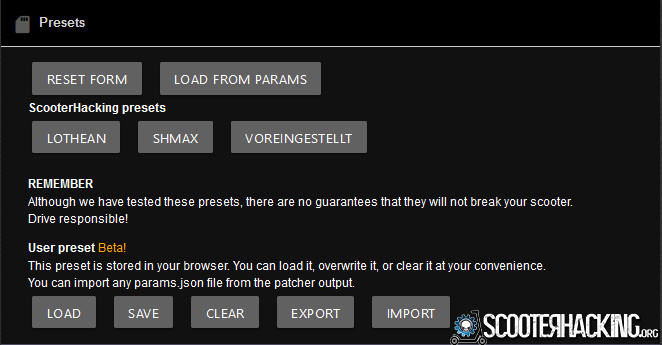
Here's where the set Preset's of the site are being shown, that are being offered by us. You can choose them, but I would recommend making your very own cfw, that suits your needs.
You also can save your actual config for the next time.
The browser you've chosen to generate your CFW will remember your config via the “save” button. One click at “Load” and the previous config will be loaded. A click at “clear” resets the set config from before.
4. Compatibility patches
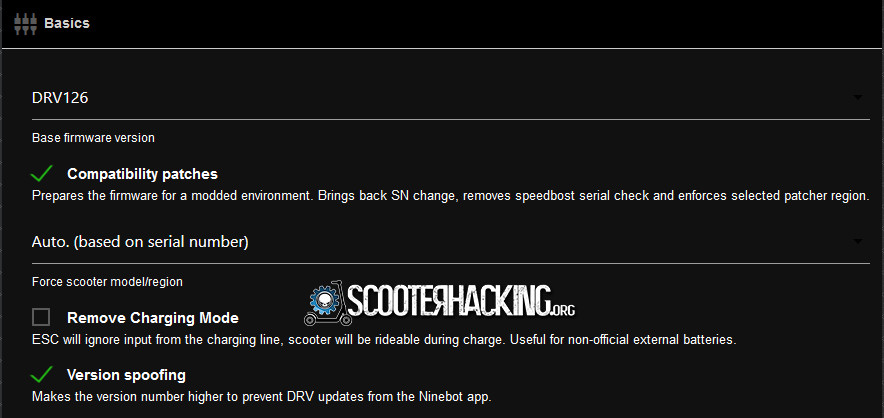
You can choose between a base firmware “DRV126” or “DRV154 (beta)” at this moment.
DRV126 provides a aggresive type of acceleration, thus also consumes more battery in a long run.
The current “DRV154” which is in a beta state seems to provide better perfomance thanks to it's algorithm, whilst giving mild loss of overall battery consumption.
“DRV154” also may comply more to patches than “DRV126” does. Useful, when you're experiencing minor problems with patches.
Short: If you are looking to gain a bit more of overall perfomance, with mild loss of battery, then choose “DRV154”, but keep in mind it's in beta at the moment.
If you're looking for a more responsive base firmware in means of acceleration, then stick with the “DRV126”, but also keep in mind, that it might drain more than “DRV154” does.
The following option will be of high interest, for those who want to use maneuvering of every kind, because this option enables the CFW to be in mind in an altered firmware state.
Always check compatibility patches to maneuver between region changes.
Normally after setting a switching to an American serial number the max. speed should be enabled. If you still are unable to reach a max. speed of 33 km/h (1 Gen) or 40 km/h (2 Gen) it's suggested, that you try a magic s/n or the speed boost option via SHU, which also alters to a magic s/n. This ensures, that the speeds that have been listed before, will be reached.
Remove Charging Mode
This removes the charging mode from stock firmware, which allows using non-official batteries / additional batteries via a y-cable. If you happen to own one and want to use it, then please set a check here.
Version spoofing
The firmware will trick apps into thinking it's already up-to-date so that they can't override your custom firmware.
This does not prevent a downgrade to stock firmware using third-party apps.
It is recommended to avoid official updates to avoid being locked out of using ScooterHacking apps. Official safe & compatible updates files are provided in the ScooterHacking Utility app or on firmware repos.
Show battery percentage on idle
![]()
Shows your battery status when in an idle-state, this only happens when reaching below 2 km/h and not using CamiBLE555. (A dashboard firmware)
5. Remember last mode
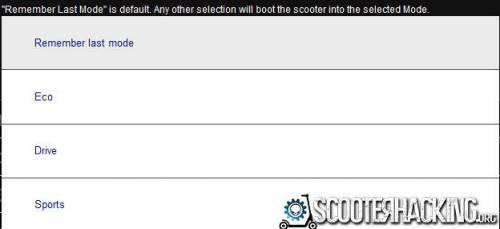
Here you can choose at which mode your max will start from now on. You can choose between Eco, Drive, Sport, or on the last chosen Mode via “Remember last mode”.
6. Power & Speed

Power, throttle & speed limits tweaking
7. Current/Ampere
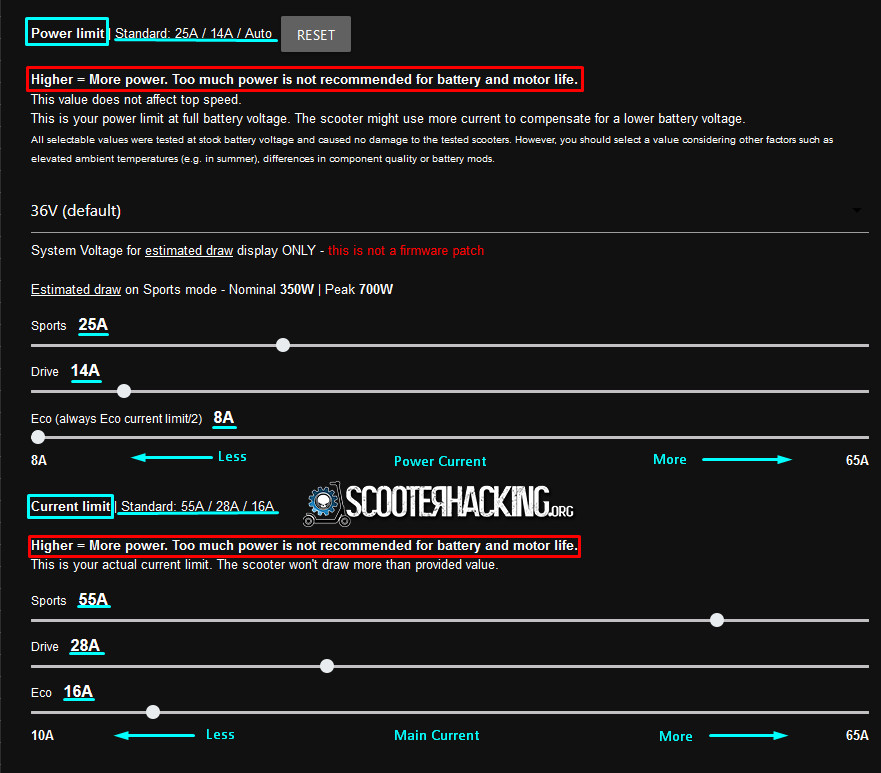
Here's where the amperes will be set. Generally speaking:
Less amperage, less power = more range
More amperage, more power = less range
You also can decide here, how many amperes in each mode will flow in.
For Sports mode, the value must be just high enough to carry your weight to the maximum speed your battery/motor setup can allow, but not too high not to drain the battery too fast or make the voltage drop too low when pressing the gas, which could end up lowering top speed.
8. Max Speed
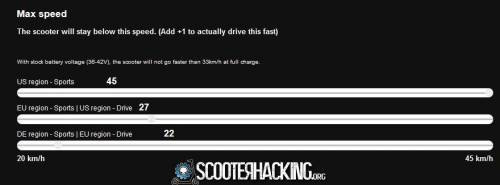
There are three types of serial numbers available on the max:
A “US” (American), (WW) (European) and “DE” (German) The G30P has the “US” one, the G30 a WW and the G30D a “DE” one.
In a event of Manuvering the state of the actual serial number will be changed temporarily between the selected one you've chosen, until you reboot it. Then it'll return to the original set serial number, that has been set by you.
The battery will more likely drain faster, when driving at high speeds. This is due to the motor needing more power to hold these speeds.
9. DPC and Curves
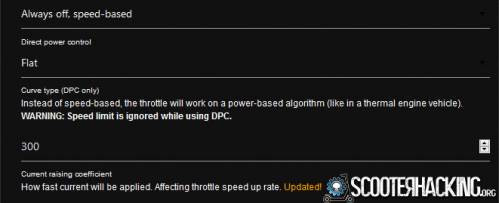
The default throttle is scaled from 0 km/h to your set speed limit for said mode/region.
Example: On stock firmware, US region, Sports mode, your throttle is mapped from 0km/h to 33km/h.
Direct Power Control allows you to control the power sent to the motor instead of the speed, like in a thermal engine vehicle.
For vulgarization purposes, let's say the throttle will then be scaled from 0A to your set current limit for said mode. Current limits are not affected by regions.
Example: Using Direct Power Control on Sports modes and default current values, your throttle is mapped from 0A to 25A.
Using the quadratic curve, you will have more control over the lower end of the current curve.
Since Direct Power Control changes the governing unit to current, any speed limit set for the current mode and/or region will be overridden when activated.
10. Current raising coefficient

When the new throttle's value & current target have been processed - either through speed-based or DPC -, the scooter will smooth out the transition to that new target.
Increasing that coefficient will lead to a faster transition.
11. Motor start speed

Pretty much self-explanatory, here you can choose when the motor will start to kick in from a range from 0 km/h to 10 km/h.
12. Brake lever parameters
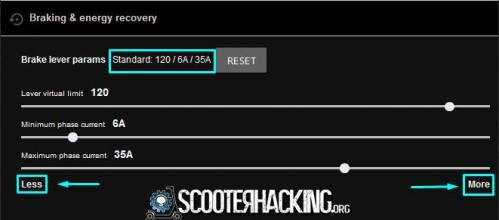
Lever virtual limit allows you to scale back the lever's virtual endpoint if your brake lever doesn't travel its full course.
You can also set braking currents here.
13. KERS (Kinetic Energy Recovering System)
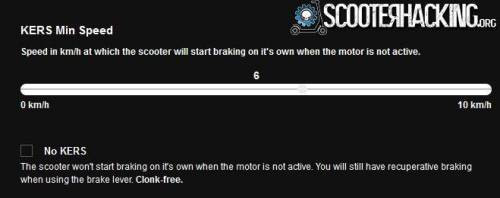
KERS kicks in when both the throttle and brake are inactive.
You can set its strength in-app (Weak, Medium, Strong), but the firmware doesn't natively allow you to get rid of it.
Using the “No KERS” option, the KERS current will be lowered just enough to keep the wheel in-circuit yet give a freewheeling effect.
14. Current rasing coefficient

Same stuff as step 10, but that now it influences, how the e-brake from the motor should react.
15. Brakelight modes and Frequencies

Here is where you set how your brake light will behave. You can choose between modes such as Default, Static, Reversed or Strobe. You also can choose how often the light should flash via the value.
16. Cruise Control
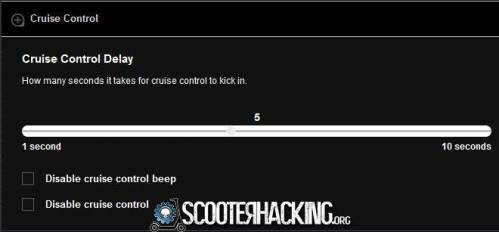
Also self-explanatory, here you can set when cruise control will kick in in seconds, when cruise control wasn't disabled. It's also possible, to deactivate it completely, when set.
Also, important to know is: When you're planing to use DPC with curves, it's highly suggested turning cruise control off, as the curves aren't limitable.
In short: The combination of DPC with cruise control is useless, as this creates a paradox, because your max now works in a power-based algorithm instead of a speed-based algorithm.
Please avoid using DPC with cruise control. Thank you.
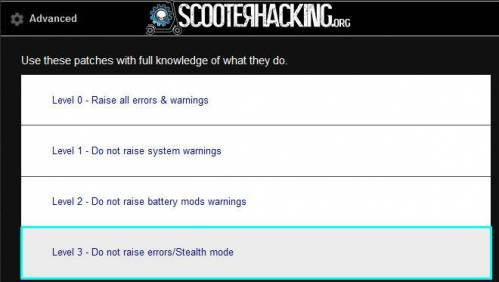
17. Advanced

Always stick to Level 1, so that important errors aren't suppressed unnecessarily. You surely want to know what's wrong with your max, and how you can fix it. Generally, leave it unselected. Only use level 2/3 for non-official batteries or stealth-mode.

No overspeed alarm
If it so happens, that you own a second-generation motor or a modded battery setup, leave a checkmark here. This will retain from your max making that obnoxious beeping alarm over 35 km/h.

Stay on when scooter locked
When you plan to use the electronic locking, and you don't want that the scooter doesn't turn off after some hours, then leave a checkmark here.

Change ESC BMS baud rate to 76800
This changes the baud value to 76800, which powers the controller to works with other types of battery management systems (BMS). When in use, checkmark it.

Wheel speed multiplier
The standard value for the max's wheels always is 10.0. If you happen to own a different size of wheels, you can change the value in inches accordingly.
18. Finished Time to cook
The very last step, that allows you to create your very own CFW.

Now you just need to select an application that you plan to use to flash it:
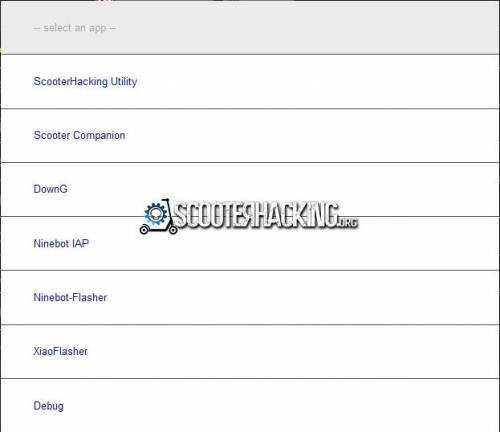
Important stuff:
Current:
It's highly recommended sticking to a max. usage of 32A as Current, because this complies to the max. recommended Amperage. The motor of the max only holds this much of the peak at a long run. Everything that goes above this Amperage or Wattage isn't recommended and happens at own risks.
You have the choice between 25A-32A, set it as you like your acceleration.
Don't forget: Higher Amperage also draws more power from the battery, which also can mean less range.
DPC and Curves:
You can set DPC as following:
Completely deactivated, speed based:

Activatable via App (SHU or SC)

When chosen and needed: Just use the App.
After rebooting, depending on your CFW, a legal speed restriction will be set again. Repeat the first step to gain DPC once again.
Activatable via brake handle:

When chosen and needed: Hold brake handle and power button at the same time for a moment. Then you'll have DPC on. After rebooting, depending on your CFW, a legal speed restriction will be set again. Repeat the first step to gain DPC once again.
Always on:

If set, DPC will be always set on. Not recommended, if you live in a country with strict speed limitations or want to use maneuvering.
Curves:
Cruise control needs to be deactivated, when one of the curves has been chosen with DPC:
Flat:


That's the flat curve, it goes straight from 0% to 100%. That's the curves every max has as a stock setting out-of-the box. Doesn't interfere the speed limits. Function well with “switchable” options
Quadratic:


This is the quadratic curve, it goes from 0% to 100% in a delayed manner. It raises slow at the beginning and achieves its real 100% somewhere in the middle, until it reaches its real 100%. This has the benefit, that you can drive smoother from now on, as the gas throttle can be dosed at a better rate than before. Functions well with “switchable” options.
Brake lever parameters:
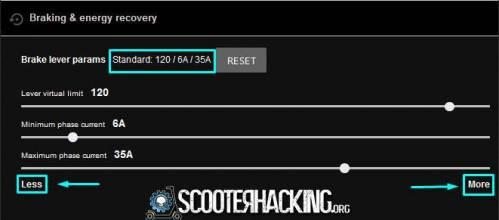
This option allows your max to manage the behavior of your motor's e-brake. Between the values of 0-130 you can choose, how sensitive the brake handle should react when attended.
More Amperage in the phase current results a stronger and faster stance, less Amperage a weaker and slower stance.
The e-brake is located in the motor (rear wheel). These brake lever parameters influence, how the rear wheel reacts and brakes electronically.
48V Mod:
If it so happens that you plan to a get 48V/13S Mod and you want to use it:
Configure as following:


Information*
*It's also to notice, that 48V/13S already has 25 amperes. Don't forget, it's only recommended to go to a max. of 27A or at best 24A. That's why i recommend you to go to a safe amperage of 24A.

or

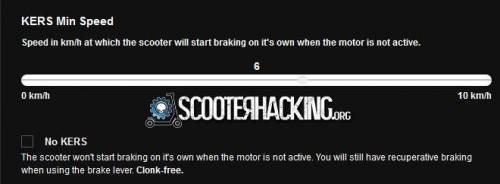
Protip: As you don't have Manuvering anymore, due to having an American serial number always in use and being “hooked” onto it, it's recommended to use switchable, register with curves of your choice as a alternative to manuevering. *KERS needs to be off , otherwise error 15 will be thrown mid-drive. Please always set NoKers for that matter.

When set to, the brake light lights always lights up in a static manner.
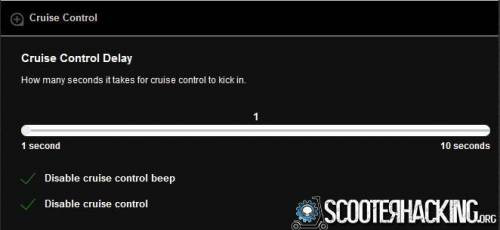

Set the rest as you like it, then it's time to cook up your CFW!

Now just change the region to “US” permanently via SHU, SC or IAP and flash your CFW via an application of your choice.
Now you can drive with your 48V/13S without further problems! Have fun! :)
Current / Ampere values (Examples):
| Amperes (Power limit) | Watts |
|---|---|
| 20 | 560 |
| 25 (Standard) | 700 |
| 30 | 840 |
| 32 (max. rec.) | 896 |
Advice: If you weigh above 100KG (220 lbs) i highly suggest you to stay below a Amperage of 32, as you are overstressing your max's internal components (as the motor phase cables f. ex) with your weight already. Setting the amperage below 32A helps to prevent, that fatal damage can be created.
Ergo: Max. 32A above 100KG (220 lbs), and if possible please go to 30A or 25A, thanks.
In general, it's also advisable to stay as low as you can with the amperes, to ensure a good overall health of all components.
For this, the rule from above can be applied, even for people for weigh under 100KG (220 lbs) f.
Generally it's recommendable to upgrade your motor phase cables connectors to more resilient ones.
(For “XT150” 6mm bullet connectors, MR60 or MT60 f. ex. or just solder the motor cables together)
| Amperes (Current Limit) | Watts |
|---|---|
| 40 | 1120 |
| 45 | 1260 |
| 50 | 1400 |
| 55 (Standard) | 1540 |
| 60 | 1600 |
| 65 (max. rec.) | 1820 |
As for the current limit it's recommended to let the peak at a max. of 65A (max. ~1.8KW) or below it.
Also here it's adviceable to maintain the current based on your weight and to your routes, as this can expand prolongevity of the components and also minimizes the battery draw.
If it so happens that you're satisfied with 55A already, then you don't need to do more tweaking. But if it may seem much to you, then you can step down the Amperes bit by bit until you're satisfied with the results.
Otherwise if you aren't satified with standard 55A you can rise up slowly until 65A.
Brake handle parameters (Examples):
| Virtual brake handle limiter | Min. Phase Current | Max. Phase Current |
|---|---|---|
| 130 (110%) | 1 | 1 |
| 120 (100%; Standard) | 6 | 35 |
| 0 (0%) | 50 | 50 |
| Recommendations | - | - |
| 2. Gen Recommendation 120 | 6 | 35 |
| 48V Recommendation 120 | 6 | 35 |
| +100KG/220 lbs Recommendation 130 | 1-6 | 20-35 |
Brake handle parameters do not have general recommedantions, but the ones above can be followed. Set them as you like. They'll change your max's brake behaviour.
Virtual brake handle values are similiar with the gas throttle values, as they decide, when the e-brake kicks in.
Min. Phasecurrent is the Amperage value (A), how many amperes will go through the e-brake by touching the brake slightly. (Beginning from 1%)
Max. Phasecurrent ist the Amperage value (A), how many amperes will go through the e-brake by touch the brake handle to its full extent. (100%)
Test yourself out with safe values and find your golden middle. Always take the standard value as the base.
Protip: If you weigh over 100 KG / 220 lbs it's adviseable to nerf the brake to avoid potential overload of the FETs or the Caps of the ESC. This is because due to your weight putting on more stress when braking and it auto. generates more counter current than it usually does.
To avoid this simply: Follow the recommendation for People who weigh over 100 KG / 220 lbs from the recommendation above and ignore anterior ones that have been listed before. Thank you!
If you want to be cautious with your settings you also can follow this recommendation even if you weigh under 100 KG / 220 lbs too.
The main reason of this warning is due to the paragraph below here:
Never brake at full battery charge, just under 95%.
E-scooters in general as the max doesn't handle KERS while braking with a battery state above 95%. When you try to brake neverthanless, you're overcharging the battery over 100% which causes severe components damage.
Always set KERS to low or off for that case. Never or just slightly brake and freewheel at the beginning of your ride, this ensures, that you still will have fun with your max!
Current raising co-efficient (Examples):
| mA per Step |
|---|
| 0- |
| 300/500 (Standard) recommend until 3500 (36V) or 5000 (48V) |
| - 16000 |
This value destinates how fast the mA will be applicated in steps.
It'll intefere the accleration- and e-brake, depending on how you set it.
Setting this wont cause any harm to your max, but decides how fast you will accelerate or brake electrionically in mA (steps).
(The only exception where this may cause harm is when breaking on a full battery. Please read especially the above on how “bypassing” KERS on a full battery can be dealt with to avoid harm to your components by overcharging them. Thank you.)
Brake light settings (Examples):
| Modes | Frequency | Behaviours |
|---|---|---|
| Default | 235 | G30's/G30P's Behaviour (Flashes while braking) |
| Static | 255 | G30D's Behaviour (Always on) |
| Reverse | 254 | Same behaviour as a car brake light |
| Strobo | 0-255 | (250 active Stroboeffect, 172 passive, 0 off etc) |
The Brake light frequencies values determines from 0-255 how often the light will be switch on or off in “PWM”.